
It is the application’s interface; it consists of all the main data related to the employees.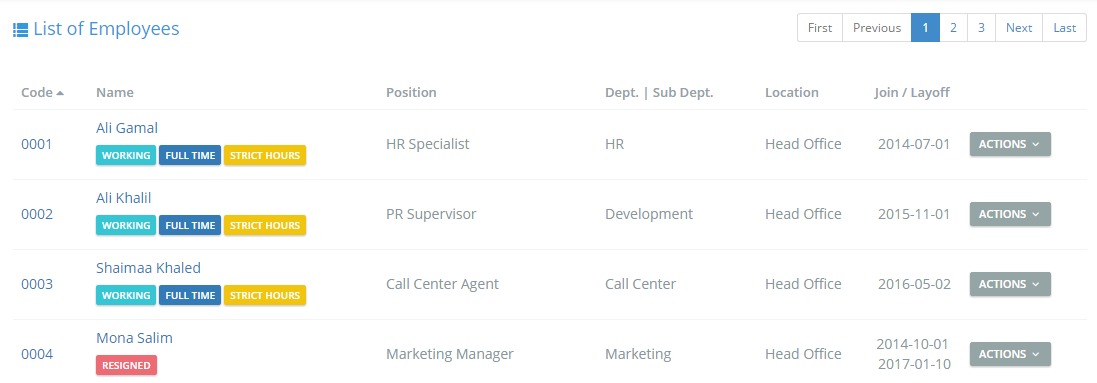
- Code: A unique number set for every employee in order to identify him.
- Name: The employee’s full name.
- Position: The employee’s job title.
- Department: The main department to which the employee belongs.
- Sub Department: A department that lies under the main department (if existed).
- Location: Company’s Branch.
- Join/Layoff: Dates.
![]()
A button that has a drop down menu which includes actions that lead you to different pages related to the employee:
Beneath Employees Names, there are three Lables
Filter

- Code
- Name
- Employment Status: Whether the employee is working, resigned or terminated.
- Contract: Full time, part time, MBO or trainee.
- Location: In which of the company’s branches does the employee work.
- Department
- Sub Department
Hint: You can filter by more than one parameter at a time (multi-filtering), so that you can decrease your searching scope as much as possible.
Action Buttons
![]() Directs you to a page that provides you with more filtering parameters.
Directs you to a page that provides you with more filtering parameters.
![]() To create accounts for new employees (Add new employees to the system).
To create accounts for new employees (Add new employees to the system).
![]() To upload employees’ data from an excel sheet to the application.
To upload employees’ data from an excel sheet to the application.
![]() To extract/download employees’ data on the application to an excel sheet.
To extract/download employees’ data on the application to an excel sheet.
Employees Bulk Import
- Click on “Import”.
- The Import Page will open.
- Click on “Download Sample”.
- Make a similar file, or fill in the sample itself.
- “Choose File” from your PC.
- Click on “Upload”.
- Choose date format, then “Validate”.
- Valid rows will be highlighted in Green.
- Invalid rows will be highlighted in Yellow.
- Wrong cells will be highlighted in Red.
- Delete invalid rows, then export them so that you can edit them separately on your PC.
- Click on “Import List”.
- Valid data will be imported to the application.
- Employees will receive emails with their new user names and passwords.
![]()
![]()
![]()
![]()
![]()

![]()
![]()
Hint:
- In case you’ve entered new data (not predefined on the application) while importing, you can add them to the system as a Bulk.
![]()
- Employee has the right to reset his password.
- “Delete” button is only for invalid data.
- You can export the deleted invalid data to your PC.
![]()
- Duplicate Employee Code.
- Wrong Date Format.
- Wrong Department/Position Name.
- Direct Head Code does not exist on the application or in the imported sheet.
- Business Email field is required as long as there is a User Name.
- Vacation Balances (Normal Vacation Balance must be more than the Casual one, whether it’s the annual or the remaining balance).